Raspberry Pi (vnc server 導入編)…PCでRaspberry Pi のDesktopを表示する。
Raspberry Pi (vnc server 導入編)
…PCでRaspberry PiのDesktopを表示
1.tightvncserverパッケージのインストール
# apt-get install tightvncserver
2.VNC Serverを起動します。初回はパスワードの設定が行われます。
# tightvncserver
→パスワード(通常=xxxxxx)
→パスワード(表示のみ=n)
3.自動起動スクリプト作成
# cd /etc/init.d
# nano tightvnc
以下のスクリプトをペースト
——————————————————————————
#!/bin/sh
### BEGIN INIT INFO
# Provides: tightvncserver
# Required-Start:
# Required-Stop:
# Default-Start: 2 3 4 5
# Default-Stop: 0 1 6
# Short-Description: start vnc server
# Description:
### END INIT INFO
. /lib/lsb/init-functions
# Carry out specific functions when asked to by the system
case “$1” in
start)
su root -c ‘vncserver :1 -geometry 1280×800 -depth 24’
echo “Starting VNC server ”
;;
stop)
pkill Xtightvnc
echo “VNC Server has been stopped (didn’t double check though)”
;;
*)
echo “Usage: /etc/init.d/tightvnc {start|stop}”
exit 1
;;
esac
——————————————————————————
4.実行権限付与
# chmod 755 /etc/init.d/vncboot
5.自動起動の登録
# update-rc.d vncboot defaults
6.再起動
# reboot
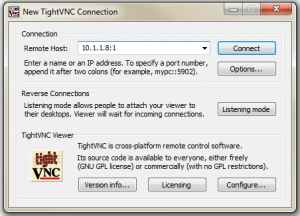
7.PCのvncビュアーから接続、パスワードを入力して
サーバ:192.168.1.xx::5901
パスワード:[xxxxxx]
Raspberry PiのDesktopが表示されればOK