Raspberry Pi 3 Model B でWordPressを動かす。(1/2)
Raspberry Pi Model Bにubuntu mate(Ubuntuのスモール版OS)を導入して、WordPress環境を構築する方法を説明します。
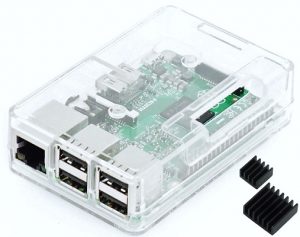
・ケース付きがお勧めです。ヒートシンクとゴム足をつければ完成です。
https://www.amazon.co.jp/Raspberry-ボード&ケースセット-Element14版-Computing-Lab/dp/B01CSFZ4JG/ref=sr_1_1?ie=UTF8&qid=1493303707&sr=8-1&keywords=raspberry%2Bpi%2B3&th=1

・安定稼働するために、3.0A程度の専用電源を使うことをお勧めします。
http://jp.rs-online.com/web/generalDisplay.html?id=raspberrypi&cm_mmc=JP-PPC-_-google-_-2_JP_JP_LS_Raspberry+Pi_Exact-_-Raspberry_Pi_3&mkwid=sCeGw6oT0-dc|pcrid|167955372668|pkw|raspberry%20pi%203|pmt|e|prd|

※1/2では、phpの設定まで説明します。
1.ubuntumate(OS) D/L & install
http://deviceplus.jp/hobby/raspberrypi_entry_048/
http://mobilenikki.cocolog-nifty.com/wzero3/2016/04/raspberry-pi3ub.html
MicroSDは32GB以上必要、64GBの場合はアイオーデータのフォーマッターでFAT32にします。
http://www.iodata.jp/lib/manual/hdpn-u/data/hddfat32.htm
image D/L→image展開→日本語環境インストール
※必要であれば、Linux Partitionを拡張します。(多分そのままでOK)
2.固定IPの設定(有線LANを使用します。トラフィックが多いので無線LANはお勧めしません。)
nano /etc/network/interfaces
# interfaces(5) file used by ifup(8) and ifdown(8)
# Include files from /etc/network/interfaces.d:
source-directory /etc/network/interfaces.d
# The loopback network interface
auto lo
iface lo inet loopback
# static ip ←以下、追記します。
auto enxb827eb863bc3 ←デバイス名はifconfigで事前に確認しておくこと。
iface enxb827eb863bc3 inet static
address 192.168.1.100 ←自分の環境に合わせます。
network 192.168.1.0 ←自分の環境に合わせます。
netmask 255.255.255.0
broadcast 192.168.1.255 ←自分の環境に合わせます。
gateway 192.168.1.1 ←自分の環境に合わせます。
dns-nameservers 192.168.1.1 ←自分の環境に合わせます。
3.ubuntumateパッケージのアップデート(少し時間が掛かります。)
apt-get update
apt-get upgrade
4.リモートデスクトップのインストール
apt-get install xrdp
5.LAMP Serverのインストール

http://linux.keicode.com/servers/lamp.php
apt-get install tasksel
tasksel install lamp-server ←画面から実行するとエラーERROR(100)になるので、直接実行します。
6.phpMyAdminのインストール
https://www.server-world.info/query?os=Ubuntu_14.04&p=mysql&f=2
apt-get install phpmyadmin
[*]apache2を選択
※mysqlのパスワード設定は、LAMPのインストール中に済ませておくこと。
7.Apache2の設定
http://ameblo.jp/rb26/entry-11440052587.html
cp -p /etc/apache2/sites-avairable/000-default.conf www.example.com.conf ←自分のドメインでvhhostを作成します。
nano www.example.com.conf
<VirtualHost *:80>
# The ServerName directive sets the request scheme, hostname and port that
# the server uses to identify itself. This is used when creating
# redirection URLs. In the context of virtual hosts, the ServerName
# specifies what hostname must appear in the request’s Host: header to
# match this virtual host. For the default virtual host (this file) this
# value is not decisive as it is used as a last resort host regardless.
# However, you must set it for any further virtual host explicitly.
#ServerName www.example.com
ServerAdmin webmaster@localhost
ServerName www.example.com
DocumentRoot /home/www/example.com ←ディレクトリを作成しておきます。
# Available loglevels: trace8, …, trace1, debug, info, notice, warn,
# error, crit, alert, emerg.
# It is also possible to configure the loglevel for particular
# modules, e.g.
#LogLevel info ssl:warn
ErrorLog ${APACHE_LOG_DIR}/error.log
CustomLog ${APACHE_LOG_DIR}/access.log combined
# For most configuration files from conf-available/, which are
# enabled or disabled at a global level, it is possible to
# include a line for only one particular virtual host. For example the
# following line enables the CGI configuration for this host only
# after it has been globally disabled with “a2disconf”.
#Include conf-available/serve-cgi-bin.conf
<Directory /home/www/example.com>
Options Indexes FollowSymLinks
AllowOverride All
Require all granted ←新バージョンのApacheはgrantを設定します。
</Directory>
</VirtualHost>
a2ensite www.example.com.conf ←シンボリックリンクが作成されます。
/usr/sbin/apache2ctl configtest ←confチェックを行います。
※vhostの有効化
a2ensite example.com
/usr/sbin/apache2ctl configtest ←confチェック!!
Apacheのリスタート
service apache2 restart

8.hosts追記
127.0.0.1 localhost
127.0.1.1 RaspberryPi-Serve ←エイリアス
127.0.0.1 www.example.com
# The following lines are desirable for IPv6 capable hosts
::1 ip6-localhost ip6-loopback
fe00::0 ip6-localnet
ff00::0 ip6-mcastprefix
ff02::1 ip6-allnodes
ff02::2 ip6-allrouters
9.MySQL設定
http://qiita.com/kojionilk/items/bdace886c3664d75c5f7
nano /etc/mysql/my.cnf
#charset added ←以下、追記します。
[mysqld]
character-set-server=utf8
skip-character-set-client-handshake
default-storage-engine=INNODB
※mysqlを再起動する。
/etc/init.d/mysql restart
rootでログインして確認します。
mysql> status;
————–
mysql Ver 14.14 Distrib 5.7.17, for Linux (armv7l) using EditLine wrapper
Connection id: 4
Current database:
Current user: root@localhost
SSL: Not in use
Current pager: stdout
Using outfile: ”
Using delimiter: ;
Server version: 5.7.17-0ubuntu0.16.04.1 (Ubuntu)
Protocol version: 10
Connection: Localhost via UNIX socket
Server characterset: utf8
Db characterset: utf8
Client characterset: utf8
Conn. characterset: utf8
UNIX socket: /var/run/mysqld/mysqld.sock
Uptime: 15 sec
Threads: 1 Questions: 6 Slow queries: 0 Opens: 107 Flush tables: 1 Open tables: 26 Queries per second avg: 0.400
————–
※ユーザーの作成
— 全ての権限を与える. 制限を加える場合は変更します。
GRANT ALL PRIVILEGES ON *.* TO (ユーザ名)@localhost IDENTIFIED BY ‘(パスワード)’ WITH GRANT OPTION;
FLUSH PRIVILEGES;
作成したユーザで MySQL にログインできるか確認します。
mysql -u (ユーザ名) -p
10.phpの設定
http://www.obenri.com/_lamp/apache_php.html
memory_limit = 50M
post_max_size = 40M
upload_max_filesize = 30M
max_input_time = 60


